CentOS+OpenVZ+Vtonf实现Linux虚拟化
来源:Linux就该这么学
时间:2025-01-06 10:12:53 389浏览 收藏
珍惜时间,勤奋学习!今天给大家带来《CentOS+OpenVZ+Vtonf实现Linux虚拟化》,正文内容主要涉及到等等,如果你正在学习文章,或者是对文章有疑问,欢迎大家关注我!后面我会持续更新相关内容的,希望都能帮到正在学习的大家!
与VMware这种虚拟机和Xen这种半虚拟化技术相比,OpenVZ的host OS和guest OS都必需是Linux(虽然在不同的虚拟环境里可以用不同的Linux发行版)。但是,OpenVZ声称这样做有性能上的优势。根据OpenVZ网站的说法,使用OpenVZ与使用独立的服务器相比,性能只会有1-3%的损失。
OpenVZ是SWsoft, Inc.公司开发的专有软件Virtuozzo的基础。OpenVZ的授权为GPLv2。OpenVZ由两部分组成,一个经修改过的操作系统核心与及用户工具。
OpenVZ 其实是很不错的,也是唯一可用于Unibilling生产用的服务器虚拟技术。目前全球有多套unibilling运行于OpenVZ container。经过3年多的VOIP连续运营生产,证实绝对可靠稳定。
CentOS安装OpenVZ创建VPS的完整步骤:CentOS-5.4-i386系统(Vtonf不支持x86-64的系统,安装过程会出错,在其INSTALL中也有说明)
打开setup界面–firewall configureation,将SELinux置为Disabled,或修改:
vi /etc/sysconfig/selinux
为:
SELINUX=disabled
SELINUXTYPE=targeted
如果不想关闭Firewall,需要打开8001端口:
# /sbin/iptables -I INPUT -p tcp –dport 8001 -j accept
# /etc/rc.d/init.d/iptables save
# /etc/init.d/iptables restart
# cd /etc/yum.repos.d
# wget http://download.openvz.org/openvz.repo
# rpm –import http://download.openvz.org/RPM-GPG-Key-OpenVZ
# yum search ovzkernel
# yum -y install ovzkernel
# yum -y install vzctl vzquota

# vi /etc/sysctl.conf

修改或添加以下内容

net.ipv4.ip_forward = 1
net.ipv4.conf.default.proxy_arp = 0
net.ipv4.conf.all.rp_filter = 1
kernel.sysrq = 1
net.ipv4.conf.default.send_redirects = 1
net.ipv4.conf.all.send_redirects = 0
net.ipv4.icmp_echo_ignore_broadcasts=1
net.ipv4.conf.default.forwarding=1

使之生效:

# sysctl -p

重启系统

# reboot
# uname -r

如果安装正常应该显示为:2.6.18-164.15.1.el5.028stab068.9
# yum -y install vzpkg expect

# wget http://mesh.dl.sourceforge.net/sourceforge/vtonf/vtonfinstaller.1.0-beta1.tar.gz
# tar xvfz vtonfinstaller.1.0-beta1.tar.gz
# cd vtonfinstaller.1.0-beta1
# ./install

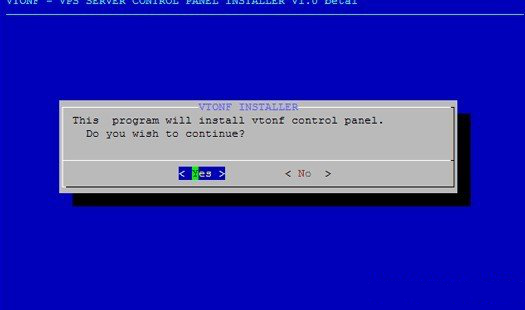
会问你是否开始安装程序,输入yes

Do you wish to start the installation procedure (y/n)? : y
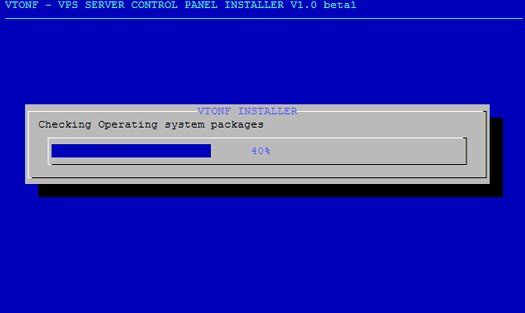
Starting installation
Please wait……………….


OK.安装完成。
打开vtonf控制面板http://yourhostip:8001/
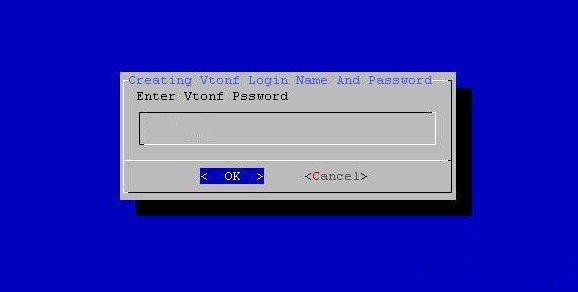
输入安装过程中你设置的用户名和密码
login Name : admin
Password :
今天带大家了解了的相关知识,希望对你有所帮助;关于文章的技术知识我们会一点点深入介绍,欢迎大家关注golang学习网公众号,一起学习编程~
-
501 收藏
-
501 收藏
-
501 收藏
-
501 收藏
-
501 收藏
-
146 收藏
-
407 收藏
-
166 收藏
-
205 收藏
-
263 收藏
-
385 收藏
-
403 收藏
-
347 收藏
-
239 收藏
-
490 收藏
-
472 收藏
-
365 收藏
-

- 前端进阶之JavaScript设计模式
- 设计模式是开发人员在软件开发过程中面临一般问题时的解决方案,代表了最佳的实践。本课程的主打内容包括JS常见设计模式以及具体应用场景,打造一站式知识长龙服务,适合有JS基础的同学学习。
- 立即学习 543次学习
-

- GO语言核心编程课程
- 本课程采用真实案例,全面具体可落地,从理论到实践,一步一步将GO核心编程技术、编程思想、底层实现融会贯通,使学习者贴近时代脉搏,做IT互联网时代的弄潮儿。
- 立即学习 516次学习
-

- 简单聊聊mysql8与网络通信
- 如有问题加微信:Le-studyg;在课程中,我们将首先介绍MySQL8的新特性,包括性能优化、安全增强、新数据类型等,帮助学生快速熟悉MySQL8的最新功能。接着,我们将深入解析MySQL的网络通信机制,包括协议、连接管理、数据传输等,让
- 立即学习 500次学习
-

- JavaScript正则表达式基础与实战
- 在任何一门编程语言中,正则表达式,都是一项重要的知识,它提供了高效的字符串匹配与捕获机制,可以极大的简化程序设计。
- 立即学习 487次学习
-

- 从零制作响应式网站—Grid布局
- 本系列教程将展示从零制作一个假想的网络科技公司官网,分为导航,轮播,关于我们,成功案例,服务流程,团队介绍,数据部分,公司动态,底部信息等内容区块。网站整体采用CSSGrid布局,支持响应式,有流畅过渡和展现动画。
- 立即学习 485次学习

