【Linux】进程池详解:进程间通信秘诀
时间:2025-04-21 18:55:08 115浏览 收藏
本文详细讲解了Linux进程间通信中的进程池技术。进程池通过预先创建多个子进程来处理并发任务,有效减少了频繁创建和销毁进程的开销,从而提升性能、降低资源消耗,并加快任务响应速度。文章通过代码示例,演示了如何使用管道实现进程间通信,以及如何封装进程池类、任务类和管道类来管理进程和任务。 文中包含了完整的代码、头文件和Makefile,并详细解释了进程池的初始化、任务分发、执行和清理过程,为读者理解和应用进程池提供了全面指导,尤其适用于需要处理CPU密集型任务的场景,如Web爬虫和数据处理等。
进程池(Process Pool)是一种管理进程的技术,通过预先创建一定数量的进程来减少频繁创建和销毁进程的开销。这种方法特别适用于需要并发执行大量任务的场景,尤其是在处理CPU密集型任务时。
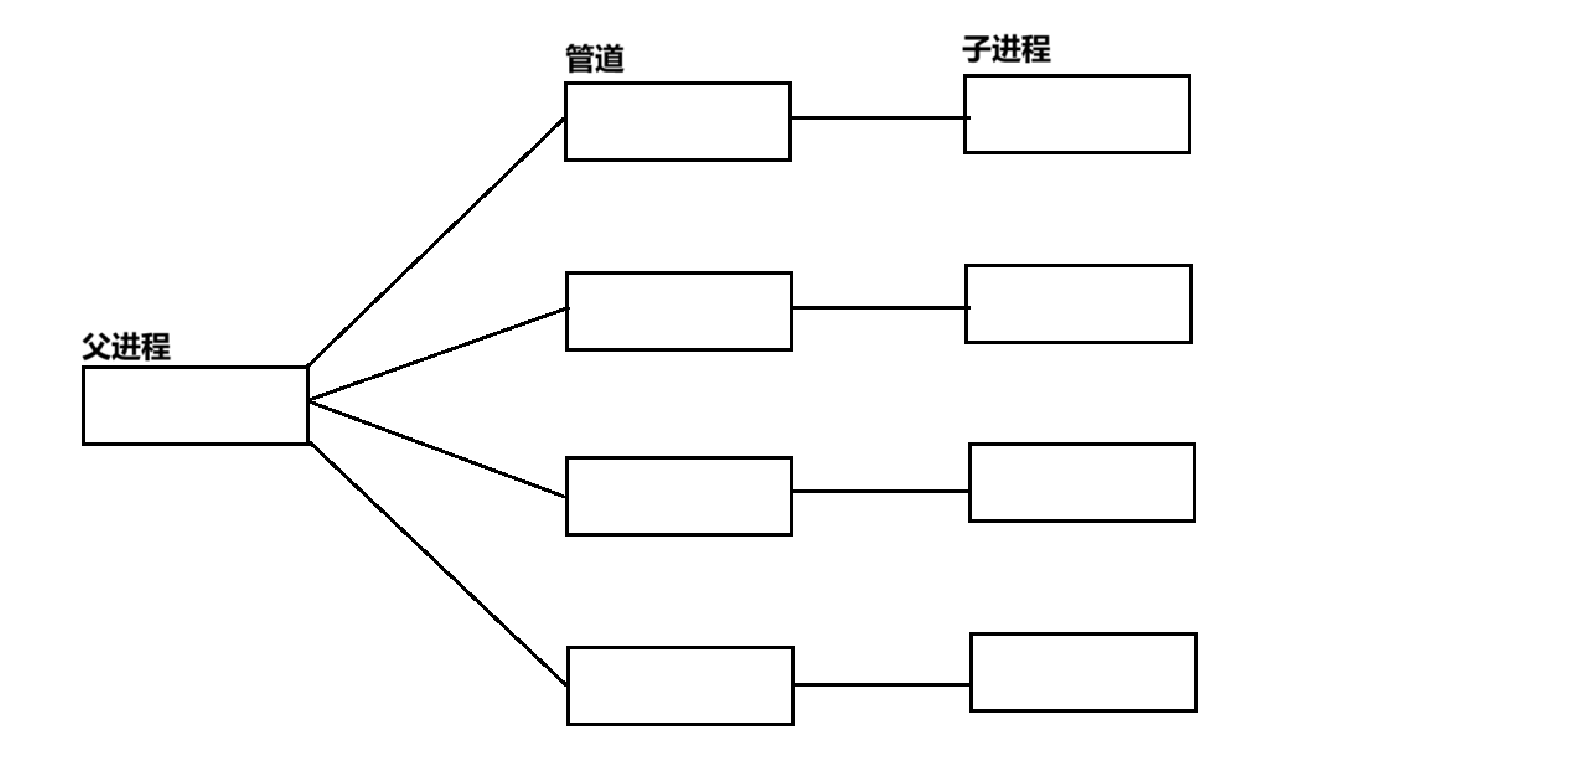
上图展示了进程池模型,其中父进程(master进程)通过创建多个子进程(worker或slaver进程)并通过管道连接,向各个子进程派发任务。
进程池的主要作用包括:
- 提高性能:通过预先创建进程,减少了频繁创建和销毁进程的开销,提升整体执行效率。
- 减少系统资源消耗:避免了频繁创建和销毁进程导致的资源浪费,进程池通过复用已有进程,节省了资源。
- 提升任务响应速度:由于进程池中的进程是预先创建的,可以快速分配空闲进程处理任务。
- 更好的资源管理:进程池可以限制系统中的最大并发进程数,保护系统资源,避免过载。
- 并行处理:对于CPU密集型任务,进程池通过并行化处理多个任务,显著提升处理效率。
进程池适用于大规模并发任务的处理,如Web爬虫、数据处理和大规模计算等场景。
代码模拟进程池管道信息
首先,我们通过控制创建子进程的数量来实现进程池。可以通过main函数的参数控制子进程的创建个数。
enum{
    OK = 0,
    UsageError,
    PipeError,
    ForkError,
};

void Usage(string proc){
    cout << "Usage: " << proc << " " << endl;
    cout << "Example: " << proc << " 4" << endl;
    exit(UsageError);
}

// main函数的第一个参数是数组元素个数,第二个元素是创建子进程个数
int main(int argc, char *argv[]){
    if(argc != 2){
        Usage(argv[0]);
        return UsageError;
    }
    int num = atoi(argv[1]);
    // 接下来创建管道和子进程
}
我们封装一个类来管理进程池:
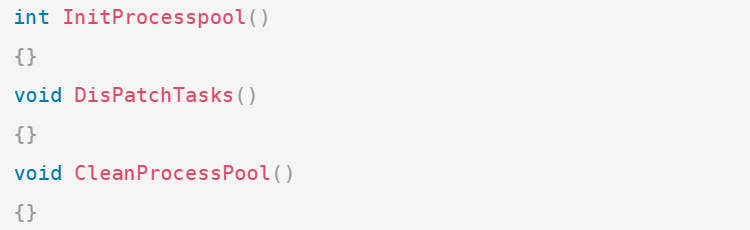
using work_t = function;

class ProcessPool{
public:
    ProcessPool(int n, work_t w) : num(n), work(w) {}
    ~ProcessPool() {}
    int InitProcesspool();
    void DisPatchTasks();
    void CleanProcessPool();
private:
    vector channels; // 管道
    int num; // 进程的个数
    work_t work; // 工作类型(void())
};
Channel类用于管理管道:
class Channel{
public:
    Channel(int wfd, pid_t who) : _wfd(wfd), _who(who) {
        _name = "Channel-" + to_string(wfd) + '-' + to_string(who);
    }
    string Name() { return _name; }
    void Send(int cmd) { write(_wfd, &cmd, sizeof(cmd)); }
    void Close() { close(_wfd); }
    pid_t Id() { return _who; }
    ~Channel() {}
private:
    int _wfd; // master的写端
    string _name; // 对应worker的名字
    pid_t _who; // 记录哪个子进程的管道
};
任务类模拟三种任务:
void Download() { cout << "Downloading..." << endl; }
void Log() { cout << "Logging..." << endl; }
void Sql() { cout << "Executing SQL..." << endl; }

using task_t = function;

class TaskManager{
public:
    TaskManager(){
        srand(time(nullptr));
        InsertTask(Download);
        InsertTask(Log);
        InsertTask(Sql);
    }
    ~TaskManager() {}
    void InsertTask(task_t t) { tasks[number++] = t; }
    int SelectTask() { return rand() % number; }
    void Excute(int number) {
        if(tasks.find(number) == tasks.end()) return;
        tasks[number]();
    }
private:
    unordered_map tasks;
};

static int number = 0;
TaskManager tmp;

void Usage(string proc){
    cout << "Usage: " << proc << " " << endl;
    cout << "Example: " << proc << " 4" << endl;
    exit(UsageError);
} 接下来实现InitProcesspool()、DisPatchTasks()和CleanProcessPool()函数:
int InitProcesspool(){
    for (int i = 0; i < num; i++) {
        int pipefd[2];
        if (pipe(pipefd) < 0) {
            perror("pipe");
            return PipeError;
        }
        pid_t pid = fork();
        if (pid < 0) {
            perror("fork");
            return ForkError;
        } else if (pid == 0) {
            close(pipefd[1]);
            dup2(pipefd[0], 0);
            close(pipefd[0]);
            work();
            exit(OK);
        } else {
            close(pipefd[0]);
            channels.push_back(Channel(pipefd[1], pid));
        }
    }
    return OK;
}

void DisPatchTasks(){
    int who = 0;
    int num = 20;
    while (num--) {
        int task = tmp.SelectTask();
        Channel &curr = channels[who];
        who++;
        who %= channels.size();
        cout << "Dispatch task " << task << " to " << curr.Name() << endl;
        curr.Send(task);
    }
}

void CleanProcessPool() {
    for (auto &c : channels) {
        c.Close();
    }
    for (auto &e : channels) {
        pid_t rid = waitpid(e.Id(), nullptr, 0);
        if (rid > 0) {
            cout << "子进程 " << rid << " 已回收" << endl;
        }
    }
}最后,封装main.cc文件:
#include "ProcessPool.hpp"
#include "Task.hpp"

int main(int argc, char *argv[]){
    if(argc != 2) {
        Usage(argv[0]);
        return UsageError;
    }
    int num = atoi(argv[1]);
    ProcessPool *pp = new ProcessPool(num, Worker);
    pp->InitProcesspool();
    pp->DisPatchTasks();
    pp->CleanProcessPool();
    delete pp;
    return 0;
}相关头文件和Makefile:
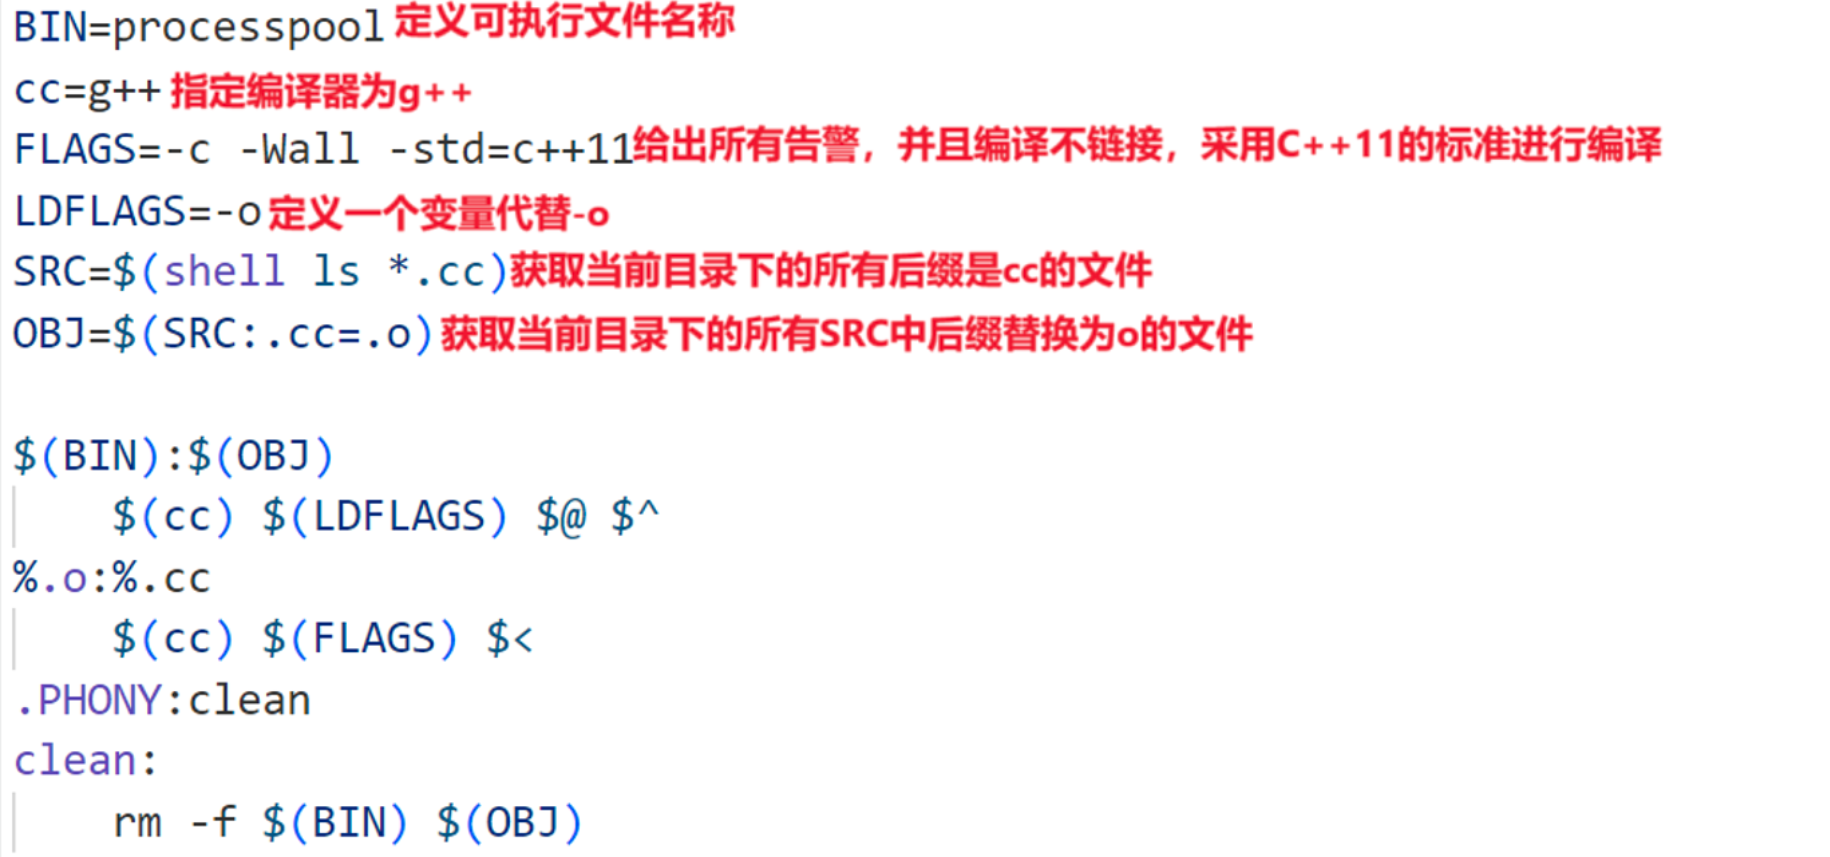
// Channel.hpp #ifndef __CHANNEL_HPP__ #define __CHANNEL_HPP__ #include#include #include using namespace std; // ... (Channel类定义) #endif // ProcessPool.hpp #include #include #include #include #include #include #include #include "Channel.hpp" #include "Task.hpp" // ... (ProcessPool类定义) // Task.hpp #pragma once #include #include #include #include using namespace std; // ... (TaskManager类定义) // Makefile BIN=processpool cc=g++ FLAGS=-c -Wall -std=c++11 LDFLAGS=-o SRC=$(shell ls *.cc) OBJ=$(SRC:.cc=.o) $(BIN):$(OBJ) $(cc) $(LDFLAGS) $@ $^ %.o:%.cc $(cc) $(FLAGS) $< clean: rm -f $(OBJ) $(BIN)
总结:
本文详细介绍了进程池的概念及其在实际应用中的作用。通过代码模拟,我们展示了如何初始化进程池、分发任务、执行任务逻辑以及清理进程池。文章还涵盖了相关的封装类和文件结构,如main.cc、Channel.hpp、ProcessPool.hpp、Task.hpp和Makefile,这些内容为理解和实现进程池提供了全面的指导。
进程池是一种有效的资源管理技术,能够提高多任务处理的效率和系统性能。通过合理的设计和实现,进程池可以在复杂的系统中发挥重要作用,减少资源浪费并提升任务执行的稳定性。希望本文的内容能为读者在实际项目中应用进程池提供有价值的参考。
本篇关于《【Linux】进程池详解:进程间通信秘诀》的介绍就到此结束啦,但是学无止境,想要了解学习更多关于文章的相关知识,请关注golang学习网公众号!
-
501 收藏
-
501 收藏
-
501 收藏
-
501 收藏
-
501 收藏
-
文章 · linux | 8小时前 | 服务器 · Linux · ssh · 运维排查 · 登录慢 · Linux SSH pam sshd_config 登录慢 UseDNS GSSAPI 密钥权限153 收藏
-
文章 · linux | 1天前 | Linux · 运维排查 · 文件句柄 · ulimit · 服务限制 · Linux 文件句柄 lsof ulimit too many open files LimitNOFILE 服务限制482 收藏
-
文章 · linux | 2天前 | Linux · 运维 · 性能排查 · 磁盘IO · iostat · pidstat · Linux 性能排查 iostat 磁盘IO pidstat %util260 收藏
-
335 收藏
-
284 收藏
-
286 收藏
-
494 收藏
-
360 收藏
-
108 收藏
-
227 收藏
-
436 收藏
-
187 收藏
-

- 前端进阶之JavaScript设计模式
- 设计模式是开发人员在软件开发过程中面临一般问题时的解决方案,代表了最佳的实践。本课程的主打内容包括JS常见设计模式以及具体应用场景,打造一站式知识长龙服务,适合有JS基础的同学学习。
- 立即学习 543次学习
-

- GO语言核心编程课程
- 本课程采用真实案例,全面具体可落地,从理论到实践,一步一步将GO核心编程技术、编程思想、底层实现融会贯通,使学习者贴近时代脉搏,做IT互联网时代的弄潮儿。
- 立即学习 516次学习
-

- 简单聊聊mysql8与网络通信
- 如有问题加微信:Le-studyg;在课程中,我们将首先介绍MySQL8的新特性,包括性能优化、安全增强、新数据类型等,帮助学生快速熟悉MySQL8的最新功能。接着,我们将深入解析MySQL的网络通信机制,包括协议、连接管理、数据传输等,让
- 立即学习 500次学习
-

- JavaScript正则表达式基础与实战
- 在任何一门编程语言中,正则表达式,都是一项重要的知识,它提供了高效的字符串匹配与捕获机制,可以极大的简化程序设计。
- 立即学习 487次学习
-

- 从零制作响应式网站—Grid布局
- 本系列教程将展示从零制作一个假想的网络科技公司官网,分为导航,轮播,关于我们,成功案例,服务流程,团队介绍,数据部分,公司动态,底部信息等内容区块。网站整体采用CSSGrid布局,支持响应式,有流畅过渡和展现动画。
- 立即学习 485次学习