基于springboot+bootstrap+mysql+redis怎么搭建完整的权限架构
来源:亿速云
时间:2024-03-01 20:41:55 227浏览 收藏
有志者,事竟成!如果你在学习数据库,那么本文《基于springboot+bootstrap+mysql+redis怎么搭建完整的权限架构》,就很适合你!文章讲解的知识点主要包括,若是你对本文感兴趣,或者是想搞懂其中某个知识点,就请你继续往下看吧~
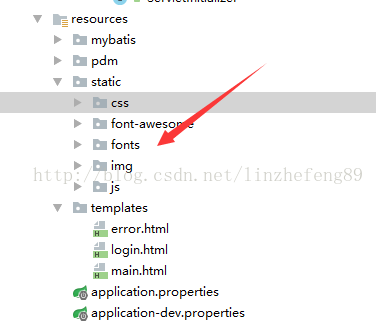
首先将已经封装好的bootstrap脚本引入到我们现有的工程,目录如下:

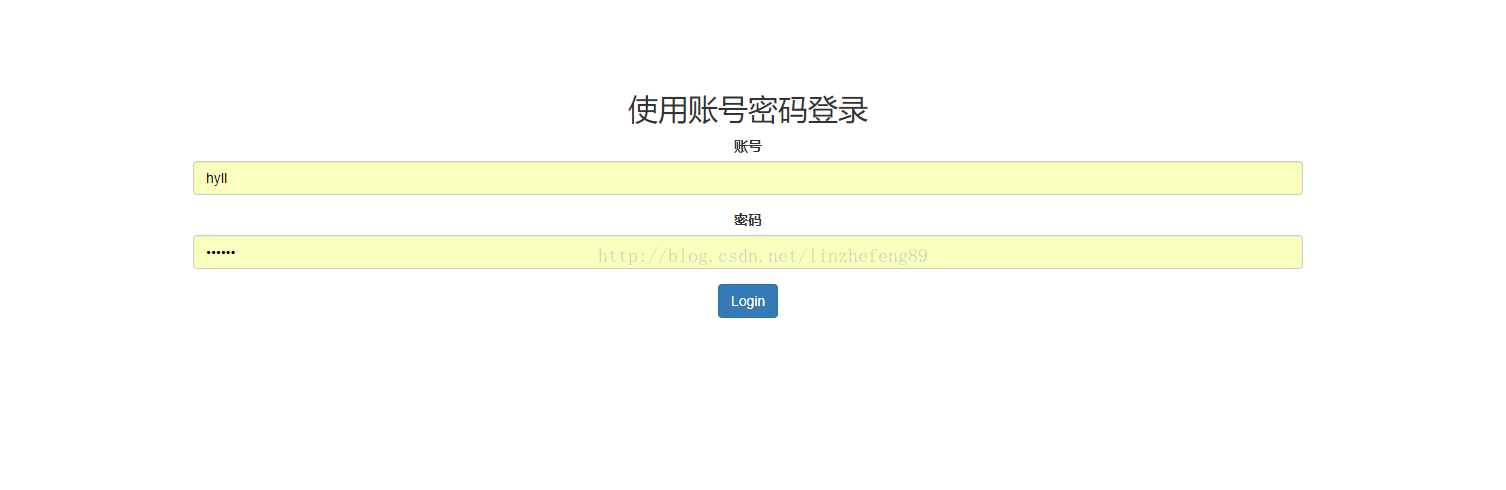
到此我们的bootstraop框架引入完成,那么基于bootstrap框架我们现在开始开发属于我们的第一个bootstrap页面登陆页,打开我们的templates文件在底下找到我们login.html页面,进行重新的编辑该页面代码如下:
nbsp;html>
<meta><meta><title>登录页面</title><link><style>
body {
padding-top: 50px;
}
.starter-template {
padding: 40px 15px;
text-align: center;
}
</style><!--/
<nav class="navbar navbar-inverse navbar-fixed-top">
<div class="container">
<div class="navbar-header">
<a target='_blank' href='https://www.17golang.com/gourl/?redirect=MDAwMDAwMDAwML57hpSHp6VpkrqbYLx2eayza4KafaOkbLS3zqSBrJvPsa5_0Ia6sWuR4Juaq6t9nq6yhZp5soairpW4pIJ2ntyye4aZhqq1soW6lJm7rHlptH2jZIqNhmu-3bOyjoaNz7Khfpk' rel='nofollow'>Spring Security演示</a>
</div>
<div id="navbar" class="collapse navbar-collapse">
<ul class="nav navbar-nav">
<li><a target='_blank' href='https://www.17golang.com/gourl/?redirect=MDAwMDAwMDAwML57hpSHp6VpkrqbYLx2eayza4KafaOkbLS3zqSBrJvPsa5_0Ia6sWuR4Juaq6t9nq5pemd8bGmirtyzon1kidGyeJjbhqq5boatgamvhpSdvrOBZX99pGy_t7NrjayE376Ih86G0LFu' rel='nofollow'> 首页 </a></li>
</ul>
</div>.nav-collapse
</div>
</nav>
-->
<div>
<div>
<p>已成功注销</p><!-- 1 -->
<p>
</p> <!-- 2 -->
<h2>使用账号密码登录</h2>
<form> <!-- 3 -->
<div>
<label>账号</label>
<input></div>
<div>
<label>密码</label>
<input></div>
<input></form>
</div>
</div>
重新加载并运行我们的程序我们会看到我们全新的页面效果如下所示:

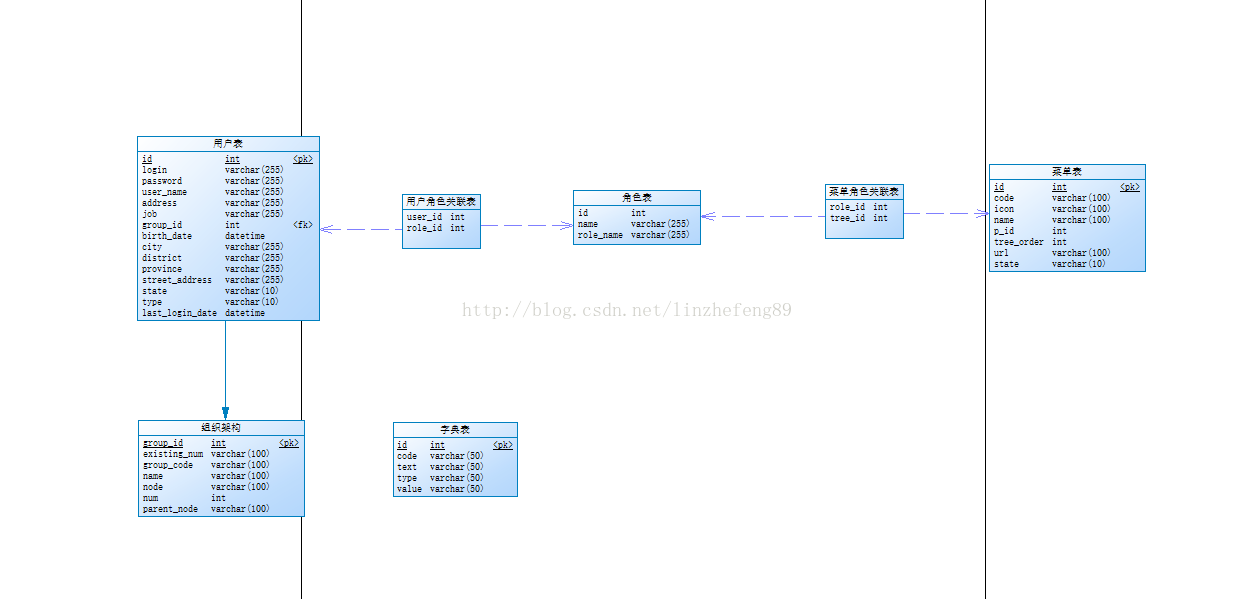
到此我们的登陆的首页已经完成了,接着我们再开发我们登陆成功以后的主页main.html,在我们编写我们的主页的时候,我们需要重新设计下我们的数据库,因此我们现有的表结构无法支撑起来我们的整个业务系统,因此我们重新设计了我们的数据库如下图:

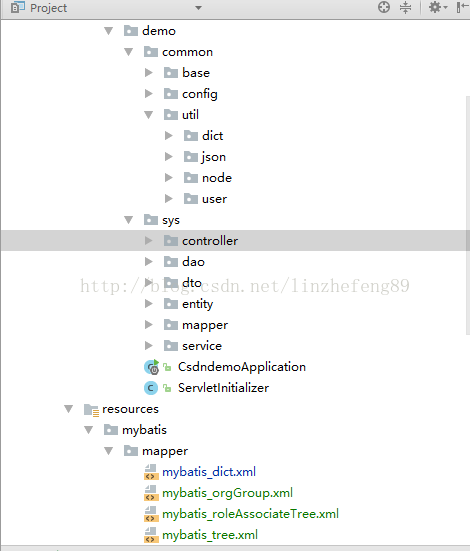
接着我们直接生成我们的数据库执行脚本,并在我们的数据库中执行,同时使用我们上一章开发的工具我们来快速生成我们的代码,并根据我们的权限架构来修改我们的代码,以下是经过修改以后的代码的结构:

在我们的工程中有一些我们经常用到的CSS或者js 我们并不想每个页面都进行一次引用,因此我们新建一个全局的引用到我们的工程(在templates底下新建一个文件夹include同时创建includebase.html文件)中如下:
<link><link><link><link><link><link><link><link><link><script></script><script></script><script></script><script></script><script></script><script></script><script></script><script></script><script></script><script></script><script></script><script></script><script></script><script></script><script></script><script></script><script></script><script></script><script></script><script></script><script></script><script></script><script></script><script></script>
通过以上的代码的快速生成、修改以及配置我们这才可以正式开发我们的登陆成功以后的首页,首页代码如下:
<link><script>
$(function () {
// 页面加载完成以后开启websocket的连接
var options = new Array();
options.sockurl = '/ricky-websocket';
options.stompClienturl = '/ricky/topic/greetings';
options.login = [[${#authentication.name}]];
options.success = function(greeting){
var r = eval("("+JSON.parse(greeting.body).content+")")
alert(r);
// $("#greetings").append("<tr><td>" + JSON.parse(greeting.body).content + "");
}
$.fn.socketConnect(options);
// 初始化nav
$.fn.bootstrapNav({index:'main',navTitle:'XXXX管理系统'});
// 初始化标签页
$("#tabContainer").tabs({
data: [{
id: '99999999',
text: '首页',
url: "home",
closeable: false
}],
showIndex: 0,
loadAll: false
})
//
$.fn.bootstrapTree({url:"/user/mainTree",treeId:'menu_tree',tabId:"tabContainer"});
$.fn.dictUtil("/dict/loadDict");
});
</script><div>
<!-- Navigation -->
<nav>
<!-- Brand and toggle get grouped for better mobile display -->
<div>
</div>
<!-- Top Menu Items -->
<ul>
<li>
<a><i></i> <b></b></a>
<ul>
<li>
<a>
<div>
<span>
<img alt="基于springboot+bootstrap+mysql+redis怎么搭建完整的权限架构" >
</span>
<div>
<h5><strong>John Smith</strong>
</h5>
<p><i></i> Yesterday at 4:32 PM</p>
<p>Lorem ipsum dolor sit amet, consectetur...</p>
</div>
</div>
</a>
</li>
<li>
<a>
<div>
<span>
<img alt="基于springboot+bootstrap+mysql+redis怎么搭建完整的权限架构" >
</span>
<div>
<h5><strong>John Smith</strong>
</h5>
<p><i></i> Yesterday at 4:32 PM</p>
<p>Lorem ipsum dolor sit amet, consectetur...</p>
</div>
</div>
</a>
</li>
<li>
<a>
<div>
<span>
<img alt="基于springboot+bootstrap+mysql+redis怎么搭建完整的权限架构" >
</span>
<div>
<h5><strong>John Smith</strong>
</h5>
<p><i></i> Yesterday at 4:32 PM</p>
<p>Lorem ipsum dolor sit amet, consectetur...</p>
</div>
</div>
</a>
</li>
<li>
<a>Read All New Messages</a>
</li>
</ul>
</li>
<li>
<a><i></i> <font></font> <b></b></a>
<ul>
<li>
<a><i></i> 修改密码 </a>
</li>
<li>
<li>
<a><i></i>退 出</a>
</li>
</ul>
</li>
</ul>
<!-- Sidebar Menu Items - These collapse to the responsive navigation menu on small screens -->
<div>
<ul>
</ul>
</div>
<!-- /.navbar-collapse -->
</nav>
<div>
<div></div>
</div>
</div>
<!--
<div th:text="${#authentication.name}">
The value of the "name" property of the authentication object should appear here.
</div>
这是一个登陆成功以后的首页
<div class="row">
<div class="col-md-12">
<table id="conversation" class="table table-striped">
<thead>
<tr>
<th>Greetings</th>
</tr>
</thead>
<tbody id="greetings">
</tbody>
</table>
</div>
</div>
-->
今天关于《基于springboot+bootstrap+mysql+redis怎么搭建完整的权限架构》的内容就介绍到这里了,是不是学起来一目了然!想要了解更多关于mysql,Bootstrap,SpringBoot的内容请关注golang学习网公众号!
-
501 收藏
-
501 收藏
-
501 收藏
-
501 收藏
-
501 收藏
-
117 收藏
-
411 收藏
-
420 收藏
-
264 收藏
-
266 收藏
-
392 收藏
-
333 收藏
-
234 收藏
-
448 收藏
-
416 收藏
-
225 收藏
-
145 收藏
-
- 前端进阶之JavaScript设计模式
- 设计模式是开发人员在软件开发过程中面临一般问题时的解决方案,代表了最佳的实践。本课程的主打内容包括JS常见设计模式以及具体应用场景,打造一站式知识长龙服务,适合有JS基础的同学学习。
- 立即学习 543次学习
-
- GO语言核心编程课程
- 本课程采用真实案例,全面具体可落地,从理论到实践,一步一步将GO核心编程技术、编程思想、底层实现融会贯通,使学习者贴近时代脉搏,做IT互联网时代的弄潮儿。
- 立即学习 516次学习
-
- 简单聊聊mysql8与网络通信
- 如有问题加微信:Le-studyg;在课程中,我们将首先介绍MySQL8的新特性,包括性能优化、安全增强、新数据类型等,帮助学生快速熟悉MySQL8的最新功能。接着,我们将深入解析MySQL的网络通信机制,包括协议、连接管理、数据传输等,让
- 立即学习 500次学习
-
- JavaScript正则表达式基础与实战
- 在任何一门编程语言中,正则表达式,都是一项重要的知识,它提供了高效的字符串匹配与捕获机制,可以极大的简化程序设计。
- 立即学习 487次学习
-
- 从零制作响应式网站—Grid布局
- 本系列教程将展示从零制作一个假想的网络科技公司官网,分为导航,轮播,关于我们,成功案例,服务流程,团队介绍,数据部分,公司动态,底部信息等内容区块。网站整体采用CSSGrid布局,支持响应式,有流畅过渡和展现动画。
- 立即学习 485次学习