使用TensorFlow和Keras创建猫狗图片深度学习分类器
来源:51CTO.COM
时间:2023-05-15 15:09:44 450浏览 收藏
有志者,事竟成!如果你在学习科技周边,那么本文《使用TensorFlow和Keras创建猫狗图片深度学习分类器》,就很适合你!文章讲解的知识点主要包括,若是你对本文感兴趣,或者是想搞懂其中某个知识点,就请你继续往下看吧~
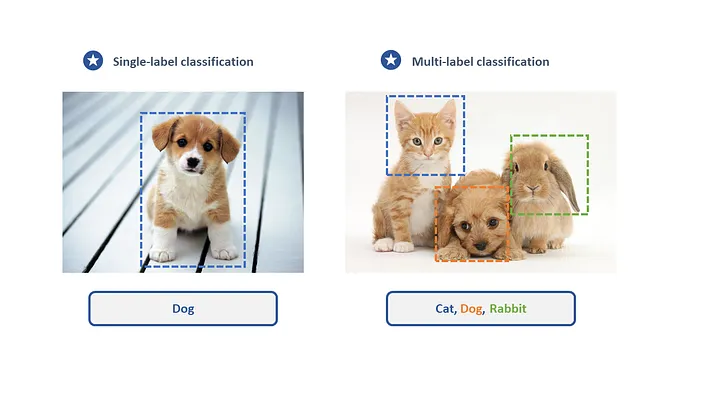
本文中,我们将利用TensorFlow和Keras开发一个图像分类器,能够对猫和狗的图像进行区分。我们将使用TensorFlow数据集中的cats_vs_dogs数据集,以实现此目标。该数据集由25000张打过标签的猫和狗的图像组成,其中80%的图像用于训练,10%用于验证,10%用于测试。
加载数据
我们开始使用TensorFlow Datasets加载数据集。将数据集拆分为训练集、验证集和测试集,分别占数据的80%、10%和10%,并定义一个函数来显示数据集中的一些样本图像。
<code>import tensorflow as tfimport matplotlib.pyplot as pltimport tensorflow_datasets as tfds# 加载数据(train_data, validation_data, test_data), info = tfds.load('cats_vs_dogs', split=['train[:80%]', 'train[80%:90%]', 'train[90%:]'], with_info=True, as_supervised=True)# 获取图像的标签label_names = info.features['label'].names# 定义一个函数来显示一些样本图像plt.figure(figsize=(10, 10))for i, (image, label) in enumerate(train_data.take(9)):ax = plt.subplot(3, 3, i + 1)plt.imshow(image)plt.title(label_names[label])plt.axis('off')</code>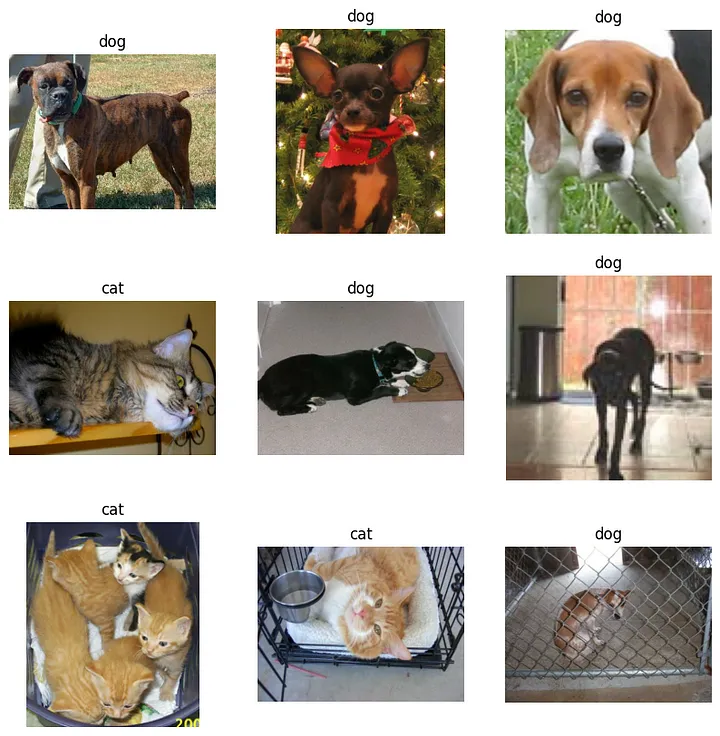
预处理数据
在训练模型之前,需要对数据进行预处理。将把图片的大小调整为150x150像素的统一尺寸,将像素值归一化为0和1之间,并对数据进行批处理,这样就可以将其分批导入模型中。
<code>IMG_SIZE = 150</code>
<code>def format_image(image, label):image = tf.cast(image, tf.float32) / 255.0# Normalize the pixel valuesimage = tf.image.resize(image, (IMG_SIZE, IMG_SIZE))# Resize to the desired sizereturn image, labelbatch_size = 32train_data = train_data.map(format_image).shuffle(1000).batch(batch_size)validation_data = validation_data.map(format_image).batch(batch_size)test_data = test_data.map(format_image).batch(batch_size)</code>
搭建模型
本文将使用预先训练好的MobileNet V2模型作为基础模型,并在其中添加一个全局平均池化层和一个紧密层来进行分类。本文将冻结基础模型的权重,以便在训练期间只更新顶层的权重。
<code>base_model = tf.keras.applications.MobileNetV2(input_shape=(IMG_SIZE, IMG_SIZE, 3), include_top=False, weights='imagenet')base_model.trainable = False</code>
<code>global_average_layer = tf.keras.layers.GlobalAveragePooling2D()prediction_layer = tf.keras.layers.Dense(1)model = tf.keras.Sequential([base_model,global_average_layer,prediction_layer])model.compile(optimizer=tf.keras.optimizers.RMSprop(lr=0.0001),loss=tf.keras.losses.BinaryCrossentropy(from_logits=True),metrics=['accuracy'])</code>
训练模型
In this article, the model will undergo training for three cycles and will be validated on the verification set at the end of each cycle.。我们将在训练后保存模型,这样就可以在以后的测试中使用它。
<code>global_average_layer = tf.keras.layers.GlobalAveragePooling2D()prediction_layer = tf.keras.layers.Dense(1)model = tf.keras.Sequential([base_model,global_average_layer,prediction_layer])model.compile(optimizer=tf.keras.optimizers.RMSprop(lr=0.0001),loss=tf.keras.losses.BinaryCrossentropy(from_logits=True),metrics=['accuracy'])</code>
<code>history = model.fit(train_data,epochs=3,validation_data=validation_data)</code>

模型历史
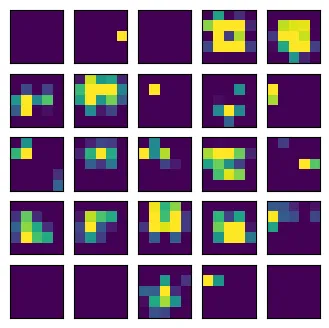
如果想知道Mobilenet V2层是如何工作的,如下图所示是该层的一个结果。
评估模型
训练完成后将在测试集上评估该模型,看看它在新数据上的表现如何。
<code>loaded_model = tf.keras.models.load_model('cats_vs_dogs.h5')test_loss, test_accuracy = loaded_model.evaluate(test_data)</code><code>print('Test accuracy:', test_accuracy)</code>进行预测
最后,本文将使用该模型对测试集中的一些样本图像进行预测,并显示结果。
<code>for image , _ in test_.take(90) : passpre = loaded_model.predict(image)plt.figure(figsize = (10 , 10))j = Nonefor value in enumerate(pre) : plt.subplot(7,7,value[0]+1)plt.imshow(image[value[0]])plt.xticks([])plt.yticks([])if value[1] > pre.mean() :j = 1color = 'blue' if j == _[value[0]] else 'red'plt.title('dog' , color = color)else : j = 0color = 'blue' if j == _[value[0]] else 'red'plt.title('cat' , color = color)plt.show()</code>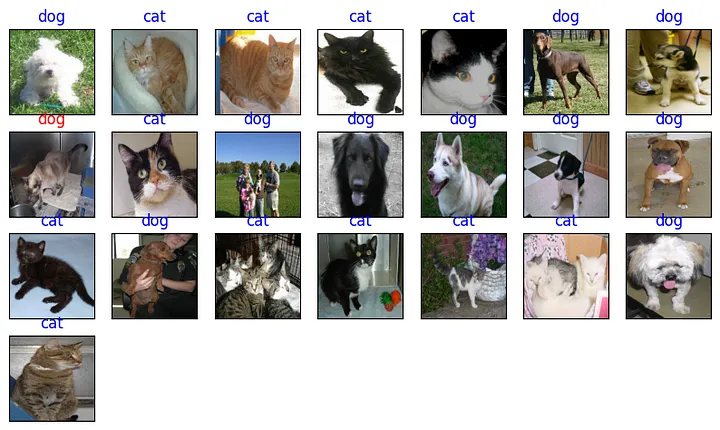
我们成功地使用了TensorFlow和Keras创建了一个图像分类器,它可以准确地区分猫和狗的图像。通过一些调整和微调,也可以将这种方法应用于其他图像分类问题。
以上就是《使用TensorFlow和Keras创建猫狗图片深度学习分类器》的详细内容,更多关于深度学习,TensorFlow,Keras的资料请关注golang学习网公众号!
-
501 收藏
-
501 收藏
-
501 收藏
-
501 收藏
-
501 收藏
-
425 收藏
-
251 收藏
-
248 收藏
-
371 收藏
-
142 收藏
-
153 收藏
-
275 收藏
-
117 收藏
-
104 收藏
-
127 收藏
-
392 收藏
-
466 收藏
-

- 前端进阶之JavaScript设计模式
- 设计模式是开发人员在软件开发过程中面临一般问题时的解决方案,代表了最佳的实践。本课程的主打内容包括JS常见设计模式以及具体应用场景,打造一站式知识长龙服务,适合有JS基础的同学学习。
- 立即学习 543次学习
-

- GO语言核心编程课程
- 本课程采用真实案例,全面具体可落地,从理论到实践,一步一步将GO核心编程技术、编程思想、底层实现融会贯通,使学习者贴近时代脉搏,做IT互联网时代的弄潮儿。
- 立即学习 516次学习
-

- 简单聊聊mysql8与网络通信
- 如有问题加微信:Le-studyg;在课程中,我们将首先介绍MySQL8的新特性,包括性能优化、安全增强、新数据类型等,帮助学生快速熟悉MySQL8的最新功能。接着,我们将深入解析MySQL的网络通信机制,包括协议、连接管理、数据传输等,让
- 立即学习 500次学习
-

- JavaScript正则表达式基础与实战
- 在任何一门编程语言中,正则表达式,都是一项重要的知识,它提供了高效的字符串匹配与捕获机制,可以极大的简化程序设计。
- 立即学习 487次学习
-

- 从零制作响应式网站—Grid布局
- 本系列教程将展示从零制作一个假想的网络科技公司官网,分为导航,轮播,关于我们,成功案例,服务流程,团队介绍,数据部分,公司动态,底部信息等内容区块。网站整体采用CSSGrid布局,支持响应式,有流畅过渡和展现动画。
- 立即学习 485次学习
