MySQL如何实时同步数据到ES?试试这款阿里开源的神器!
来源:SegmentFault
时间:2023-01-21 20:13:23 468浏览 收藏
在IT行业这个发展更新速度很快的行业,只有不停止的学习,才不会被行业所淘汰。如果你是数据库学习者,那么本文《MySQL如何实时同步数据到ES?试试这款阿里开源的神器!》就很适合你!本篇内容主要包括MySQL如何实时同步数据到ES?试试这款阿里开源的神器!,希望对大家的知识积累有所帮助,助力实战开发!
[mysqld]
## 设置server_id,同一局域网中需要唯一
server_id=101
## 指定不需要同步的数据库名称
binlog-ignore-db=mysql
## 开启二进制日志功能
log-bin=mall-mysql-bin
## 设置二进制日志使用内存大小(事务)
binlog_cache_size=1M
## 设置使用的二进制日志格式(mixed,statement,row)
binlog_format=row
## 二进制日志过期清理时间。默认值为0,表示不自动清理。
expire_logs_days=7
## 跳过主从复制中遇到的所有错误或指定类型的错误,避免slave端复制中断。
## 如:1062错误是指一些主键重复,1032错误是因为主从数据库数据不一致
slave_skip_errors=1062
- 配置完成后需要重新启动MySQL,重启成功后通过如下命令查看binlog是否启用;
show variables like '%log_bin%'show variables like 'binlog_format%';CREATE USER canal IDENTIFIED BY 'canal'; GRANT SELECT, REPLICATION SLAVE, REPLICATION CLIENT ON *.* TO 'canal'@'%'; FLUSH PRIVILEGES;
- 创建好测试用的数据库
CREATE TABLE `product`  (
  `id` bigint(20) NOT NULL AUTO_INCREMENT,
  `title` varchar(255) CHARACTER SET utf8 COLLATE utf8_general_ci NULL DEFAULT NULL,
  `sub_title` varchar(255) CHARACTER SET utf8 COLLATE utf8_general_ci NULL DEFAULT NULL,
  `price` decimal(10, 2) NULL DEFAULT NULL,
  `pic` varchar(255) CHARACTER SET utf8 COLLATE utf8_general_ci NULL DEFAULT NULL,
  PRIMARY KEY (`id`) USING BTREE
) ENGINE = InnoDB AUTO_INCREMENT = 2 CHARACTER SET = utf8 COLLATE = utf8_general_ci ROW_FORMAT = Dynamic;
canal-server使用
- 将我们下载好的压缩包
tar -zxvf canal.deployer-1.1.5-SNAPSHOT.tar.gz
- 解压完成后目录结构如下;
sh bin/startup.sh
- 启动成功后可使用如下命令查看服务日志信息;
tail -f logs/canal/canal.log2020-10-26 16:18:13.354 [main] INFO com.alibaba.otter.canal.deployer.CanalController - ## start the canal server[172.17.0.1(172.17.0.1):11111] 2020-10-26 16:18:19.978 [main] INFO com.alibaba.otter.canal.deployer.CanalStarter - ## the canal server is running now ......
- 启动成功后可使用如下命令查看instance日志信息;
tail -f logs/example/example.log2020-10-26 16:18:16.056 [main] INFO c.a.o.c.i.spring.support.PropertyPlaceholderConfigurer - Loading properties file from class path resource [canal.properties] 2020-10-26 16:18:16.061 [main] INFO c.a.o.c.i.spring.support.PropertyPlaceholderConfigurer - Loading properties file from class path resource [example/instance.properties] 2020-10-26 16:18:18.259 [main] INFO c.a.otter.canal.instance.spring.CanalInstanceWithSpring - start CannalInstance for 1-example 2020-10-26 16:18:18.282 [main] WARN c.a.o.canal.parse.inbound.mysql.dbsync.LogEventConvert - --> init table filter : ^.*\..*$ 2020-10-26 16:18:18.282 [main] WARN c.a.o.canal.parse.inbound.mysql.dbsync.LogEventConvert - --> init table black filter : ^mysql\.slave_.*$ 2020-10-26 16:18:19.543 [destination = example , address = /127.0.0.1:3306 , EventParser] WARN c.a.o.c.p.inbound.mysql.rds.RdsBinlogEventParserProxy - ---> begin to find start position, it will be long time for reset or first position 2020-10-26 16:18:19.578 [main] INFO c.a.otter.canal.instance.core.AbstractCanalInstance - start successful.... 2020-10-26 16:18:19.912 [destination = example , address = /127.0.0.1:3306 , EventParser] WARN c.a.o.c.p.inbound.mysql.rds.RdsBinlogEventParserProxy - prepare to find start position just last position {"identity":{"slaveId":-1,"sourceAddress":{"address":"localhost","port":3306}},"postion":{"gtid":"","included":false,"journalName":"mall-mysql-bin.000006","position":2271,"serverId":101,"timestamp":1603682664000}} 2020-10-26 16:18:22.435 [destination = example , address = /127.0.0.1:3306 , EventParser] WARN c.a.o.c.p.inbound.mysql.rds.RdsBinlogEventParserProxy - ---> find start position successfully, EntryPosition[included=false,journalName=mall-mysql-bin.000006,position=2271,serverId=101,gtid=,timestamp=1603682664000] cost : 2768ms , the next step is binlog dump
- 如果想要停止
sh bin/stop.shcanal-adapter使用
- 将我们下载好的压缩包
canal.conf:
  mode: tcp # 客户端的模式,可选tcp kafka rocketMQ
  flatMessage: true # 扁平message开关, 是否以json字符串形式投递数据, 仅在kafka/rocketMQ模式下有效
  zookeeperHosts:    # 对应集群模式下的zk地址
  syncBatchSize: 1000 # 每次同步的批数量
  retries: 0 # 重试次数, -1为无限重试
  timeout: # 同步超时时间, 单位毫秒
  accessKey:
  secretKey:
  consumerProperties:
    # canal tcp consumer
    canal.tcp.server.host: 127.0.0.1:11111 #设置canal-server的地址
    canal.tcp.zookeeper.hosts:
    canal.tcp.batch.size: 500
    canal.tcp.username:
    canal.tcp.password:

  srcDataSources: # 源数据库配置
    defaultDS:
      url: jdbc:mysql://127.0.0.1:3306/canal_test?useUnicode=true
      username: canal
      password: canal
  canalAdapters: # 适配器列表
  - instance: example # canal实例名或者MQ topic名
    groups: # 分组列表
    - groupId: g1 # 分组id, 如果是MQ模式将用到该值
      outerAdapters:
      - name: logger # 日志打印适配器
      - name: es7 # ES同步适配器
        hosts: 127.0.0.1:9200 # ES连接地址
        properties:
          mode: rest # 模式可选transport(9300) 或者 rest(9200)
          # security.auth: test:123456 #  only used for rest mode
          cluster.name: elasticsearch # ES集群名称
- 添加配置文件
dataSourceKey: defaultDS # 源数据源的key, 对应上面配置的srcDataSources中的值
destination: example  # canal的instance或者MQ的topic
groupId: g1 # 对应MQ模式下的groupId, 只会同步对应groupId的数据
esMapping:
  _index: canal_product # es 的索引名称
  _id: _id  # es 的_id, 如果不配置该项必须配置下面的pk项_id则会由es自动分配
  sql: "SELECT
            p.id AS _id,
            p.title,
            p.sub_title,
            p.price,
            p.pic
        FROM
            product p"        # sql映射
  etlCondition: "where a.c_time>={}"   #etl的条件参数
  commitBatch: 3000   # 提交批大小
- 使用
sh bin/startup.sh
- 启动成功后可使用如下命令查看服务日志信息;
tail -f logs/adapter/adapter.logsh bin/stop.sh数据同步演示
经过上面的一系列步骤,canal的数据同步功能已经基本可以使用了,下面我们来演示下数据同步功能。
- 首先我们需要在Elasticsearch中创建索引,和MySQL中的product表相对应,直接在Kibana的
INSERT INTO product ( id, title, sub_title, price, pic ) VALUES ( 5, '小米8', ' 全面屏游戏智能手机 6GB+64GB', 1999.00, NULL );
- 创建成功后,在Elasticsearch中搜索下,发现数据已经同步了;
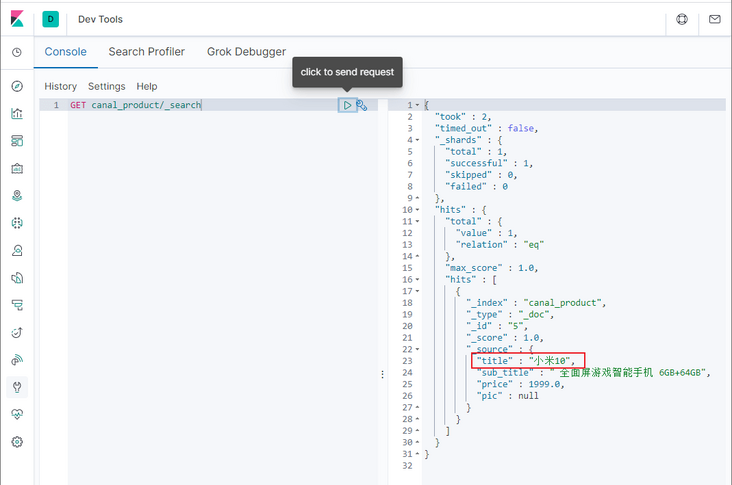
UPDATE product SET title='小米10' WHERE id=5
- 修改成功后,在Elasticsearch中搜索下,发现数据已经修改了;
- 再使用如下SQL对数据进行删除操作;
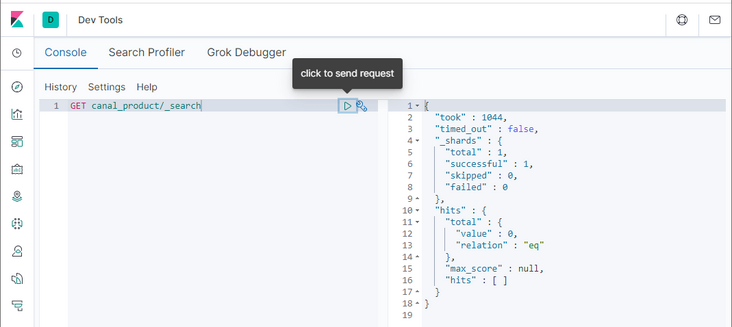
DELETE FROM product WHERE id=5
- 删除成功后,在Elasticsearch中搜索下,发现数据已经删除了,至此MySQL同步到Elasticsearch的功能完成了!
canal-admin使用
- 将我们下载好的压缩包
server:
  port: 8089
spring:
  jackson:
    date-format: yyyy-MM-dd HH:mm:ss
    time-zone: GMT+8

spring.datasource:
  address: 127.0.0.1:3306
  database: canal_manager
  username: root
  password: root
  driver-class-name: com.mysql.jdbc.Driver
  url: jdbc:mysql://${spring.datasource.address}/${spring.datasource.database}?useUnicode=true&characterEncoding=UTF-8&useSSL=false
  hikari:
    maximum-pool-size: 30
    minimum-idle: 1

canal:
  adminUser: admin
  adminPasswd: admin
- 接下来对之前搭建的
sh bin/startup.sh
- 启动成功后可使用如下命令查看服务日志信息;
tail -f logs/admin.log020-10-27 10:15:04.210 [main] INFO org.apache.coyote.http11.Http11NioProtocol - Starting ProtocolHandler ["http-nio-8089"] 2020-10-27 10:15:04.308 [main] INFO org.apache.tomcat.util.net.NioSelectorPool - Using a shared selector for servlet write/read 2020-10-27 10:15:04.534 [main] INFO o.s.boot.web.embedded.tomcat.TomcatWebServer - Tomcat started on port(s): 8089 (http) with context path '' 2020-10-27 10:15:04.573 [main] INFO com.alibaba.otter.canal.admin.CanalAdminApplication - Started CanalAdminApplication in 31.203 seconds (JVM running for 34.865)
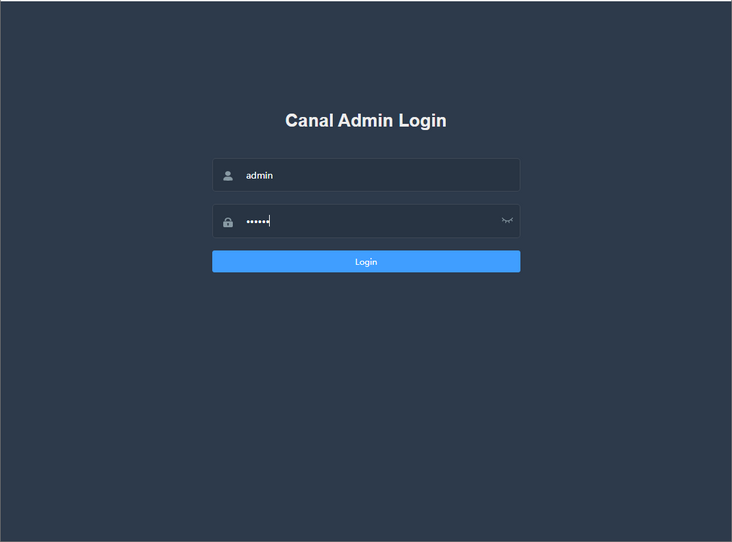
- 访问canal-admin的Web界面,输入账号密码
admin:123456即可登录,访问地址:http://192.168.3.101:8089
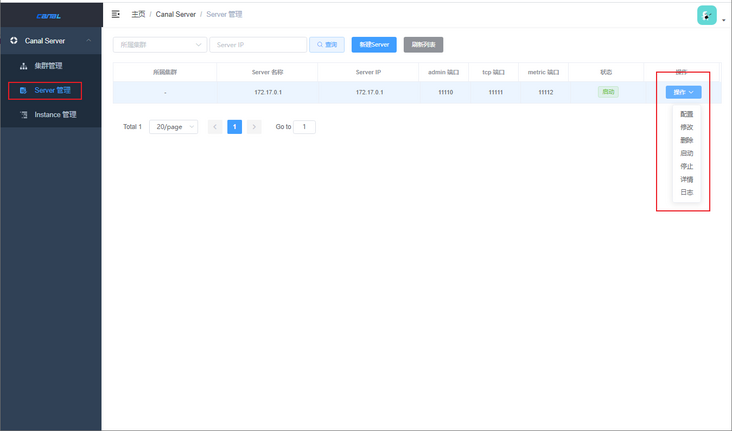
- 登录成功后即可使用Web界面操作canal-server。
参考资料
canal官方文档:https://github.com/alibaba/ca...
配置文件地址
https://github.com/macrozheng...
本文 GitHub https://github.com/macrozheng/mall-learning 已经收录,欢迎大家Star!到这里,我们也就讲完了《MySQL如何实时同步数据到ES?试试这款阿里开源的神器!》的内容了。个人认为,基础知识的学习和巩固,是为了更好的将其运用到项目中,欢迎关注golang学习网公众号,带你了解更多关于mysql的知识点!
声明:本文转载于:SegmentFault 如有侵犯,请联系study_golang@163.com删除
相关阅读
更多>
-
374 收藏
-
499 收藏
-
384 收藏
-
184 收藏
-
265 收藏
最新阅读
更多>
课程推荐
更多>
-

- 前端进阶之JavaScript设计模式
- 设计模式是开发人员在软件开发过程中面临一般问题时的解决方案,代表了最佳的实践。本课程的主打内容包括JS常见设计模式以及具体应用场景,打造一站式知识长龙服务,适合有JS基础的同学学习。
- 立即学习 543次学习
-

- GO语言核心编程课程
- 本课程采用真实案例,全面具体可落地,从理论到实践,一步一步将GO核心编程技术、编程思想、底层实现融会贯通,使学习者贴近时代脉搏,做IT互联网时代的弄潮儿。
- 立即学习 516次学习
-

- 简单聊聊mysql8与网络通信
- 如有问题加微信:Le-studyg;在课程中,我们将首先介绍MySQL8的新特性,包括性能优化、安全增强、新数据类型等,帮助学生快速熟悉MySQL8的最新功能。接着,我们将深入解析MySQL的网络通信机制,包括协议、连接管理、数据传输等,让
- 立即学习 500次学习
-

- JavaScript正则表达式基础与实战
- 在任何一门编程语言中,正则表达式,都是一项重要的知识,它提供了高效的字符串匹配与捕获机制,可以极大的简化程序设计。
- 立即学习 487次学习
-

- 从零制作响应式网站—Grid布局
- 本系列教程将展示从零制作一个假想的网络科技公司官网,分为导航,轮播,关于我们,成功案例,服务流程,团队介绍,数据部分,公司动态,底部信息等内容区块。网站整体采用CSSGrid布局,支持响应式,有流畅过渡和展现动画。
- 立即学习 485次学习